12 Dec 2025 - 0.7 hours
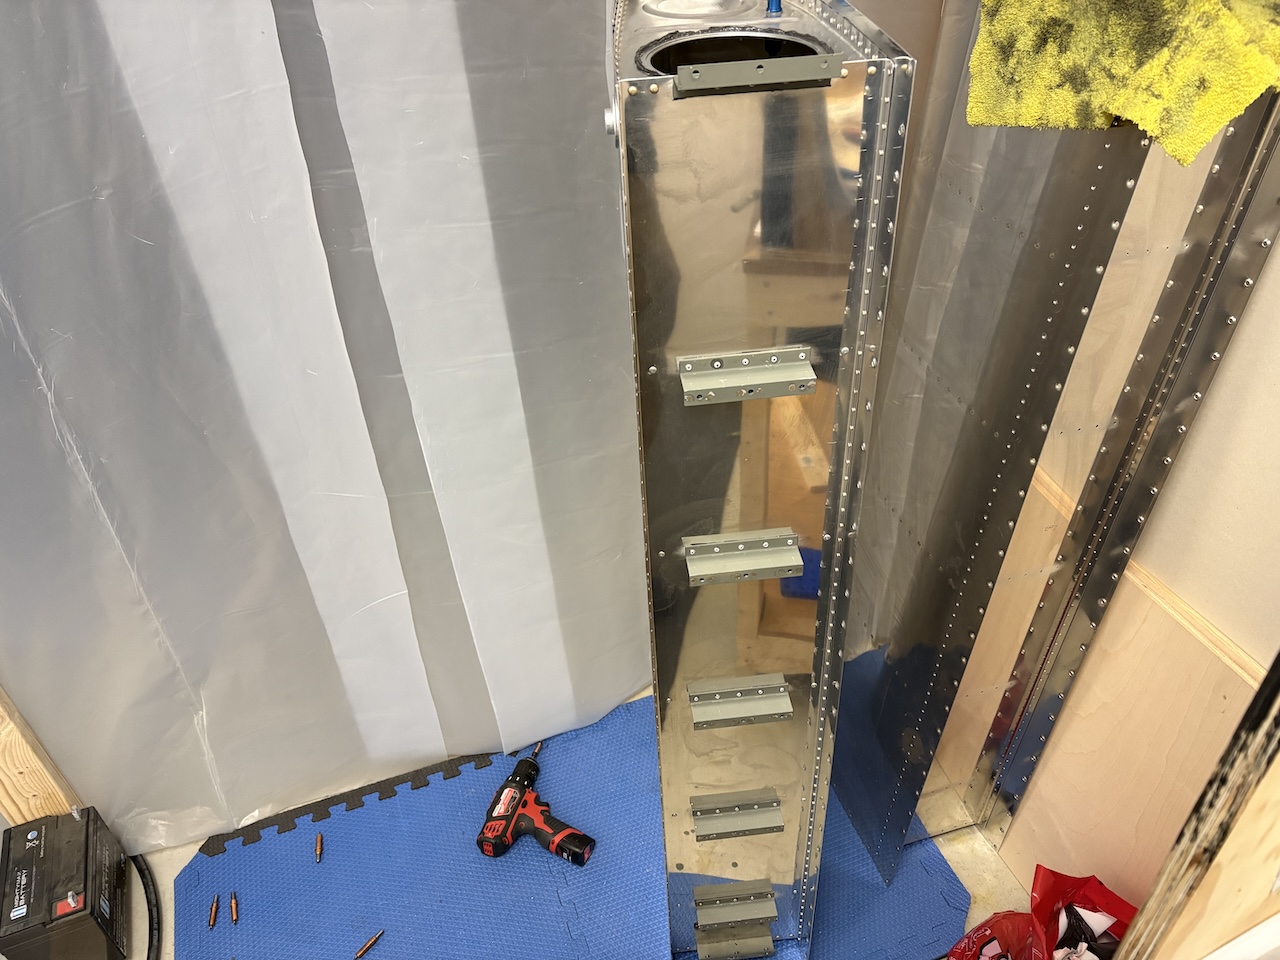
Big night tonight as I finished up the right tank -- what a milestone!Here is the shot of the Z-brackets I forgot to take last session...
I did the old paper funnel application method and it was easy, clean, and effective. I mixed up 16.5 grams of sealant and there was quite a bit left over. Here I have applied the bead for the tank access panel.
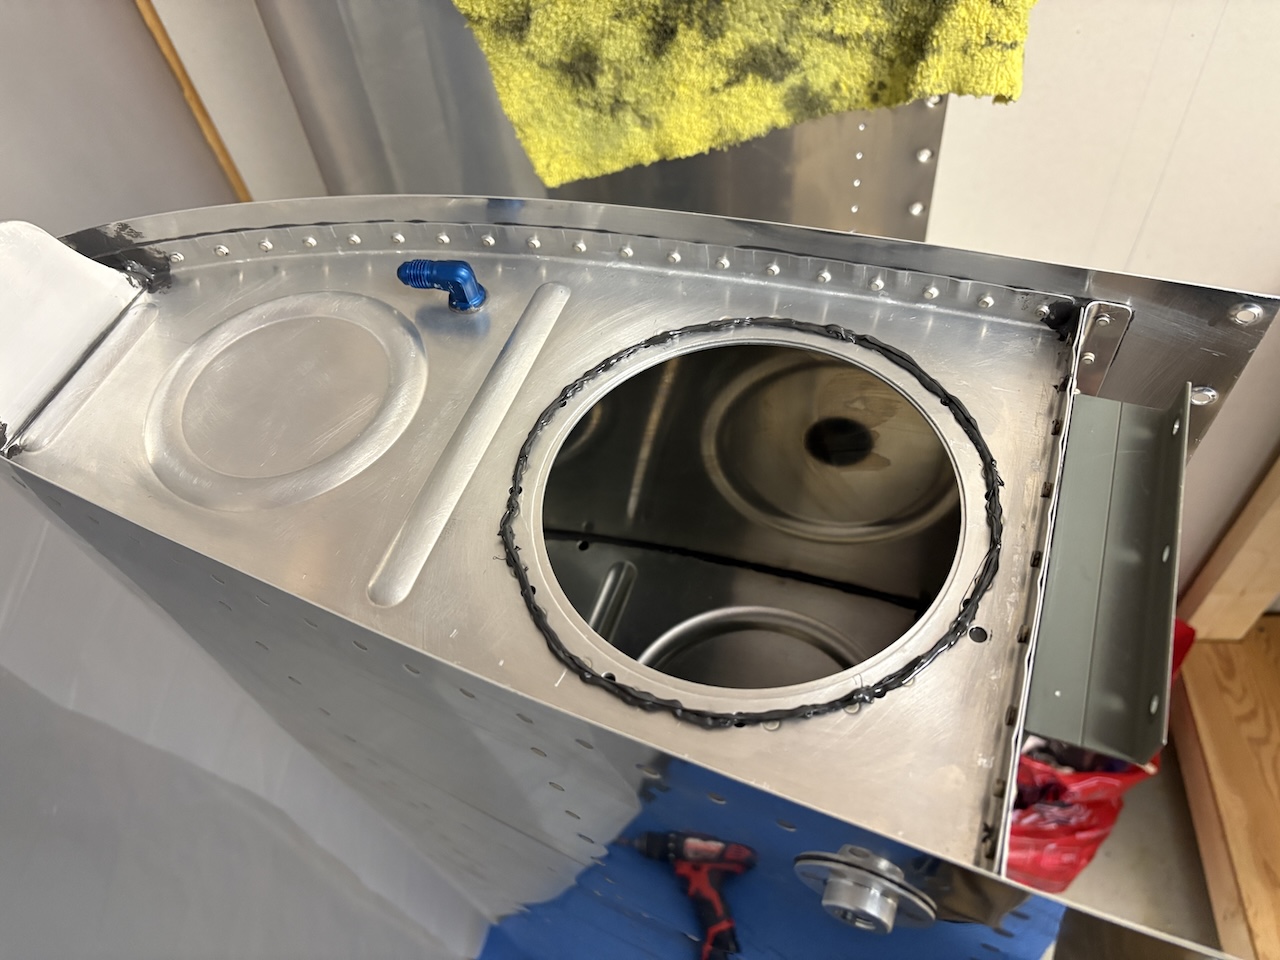
Then I dropped it into place.
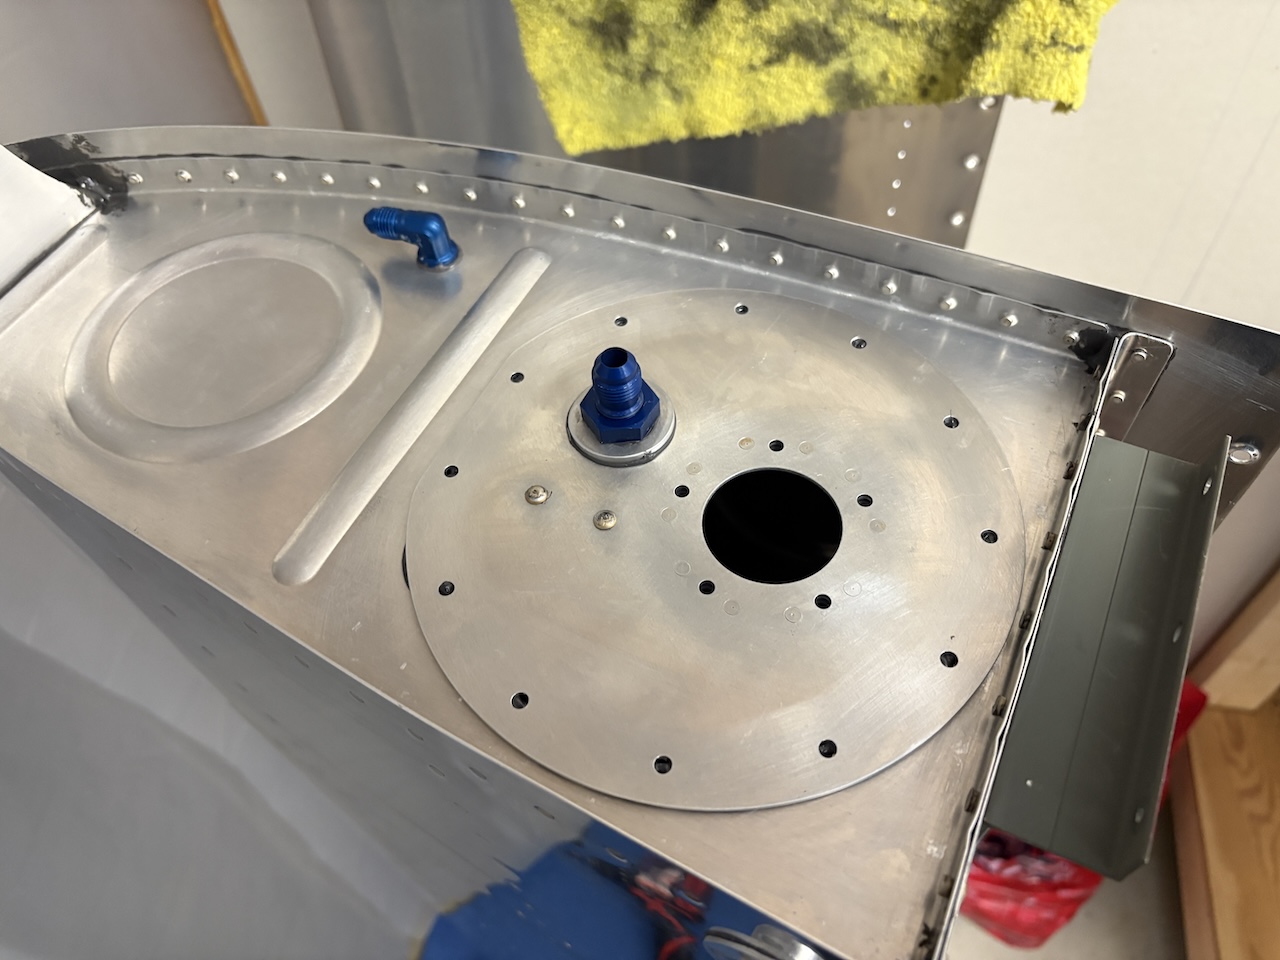
And screwed it down. I bought some stainless steel hex drive screws from McMaster Carr to replace the Phillips head screws that came with the kit. They were incredibly easy to drive in and if the need ever arises, should be just as easy to remove (or at least easier than the Phillips head screws that came with the kit).
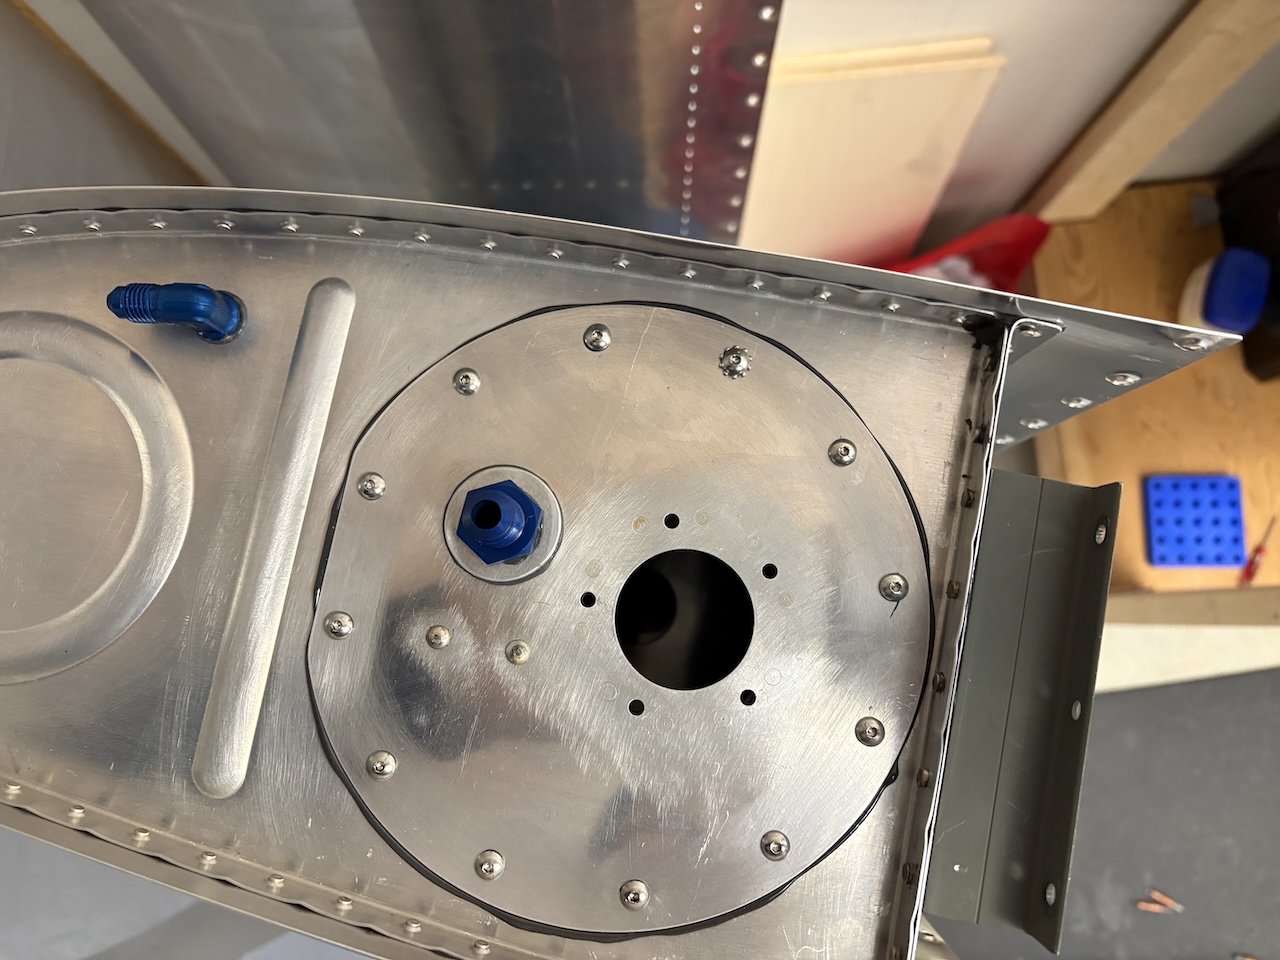
Then I moved onto the fuel float sender and did the same thing, starting with the bead.
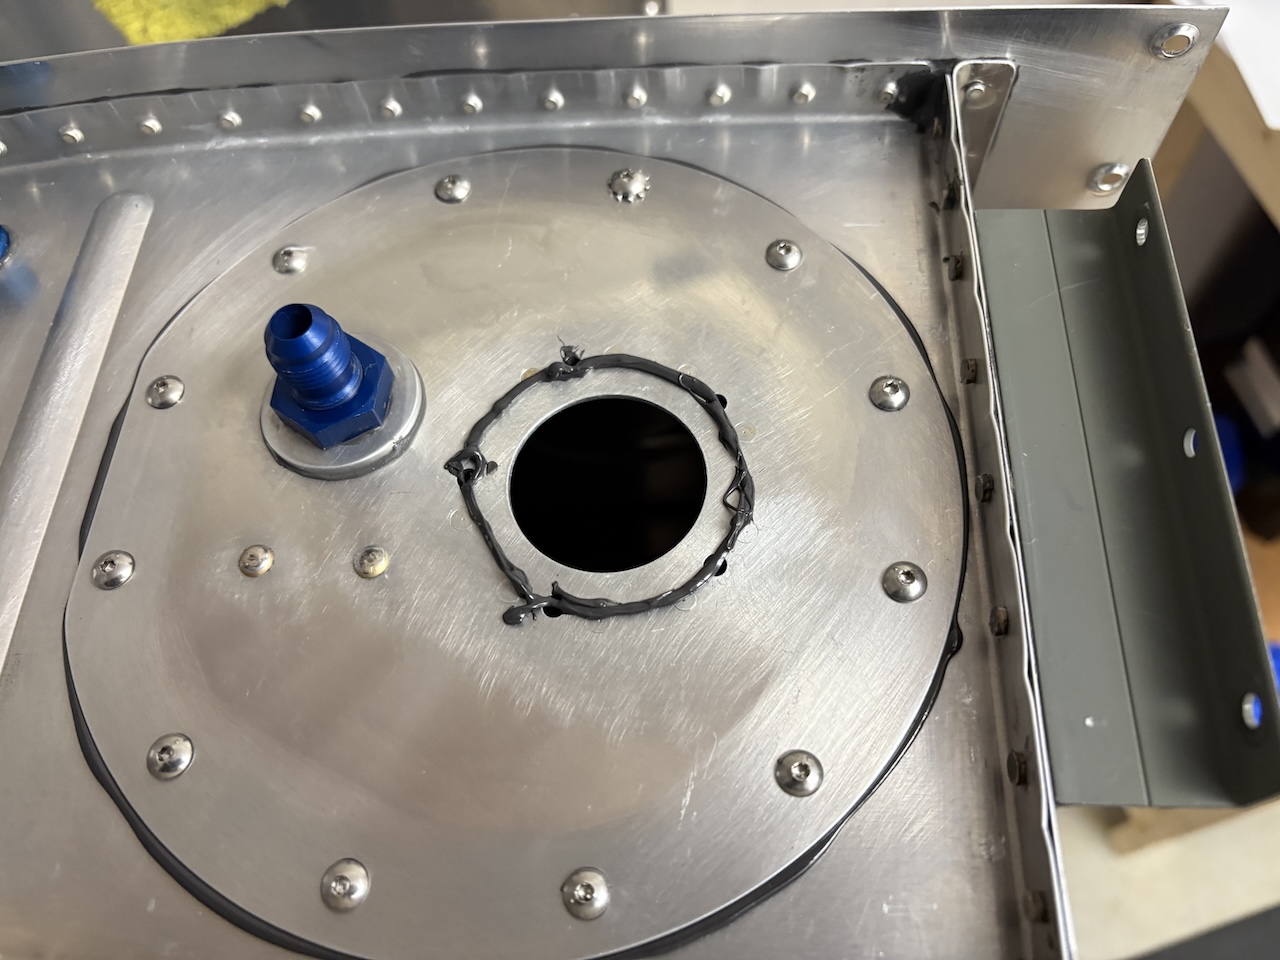
I carefully threaded the float into the hole, making sure to not smear it in the sealant.
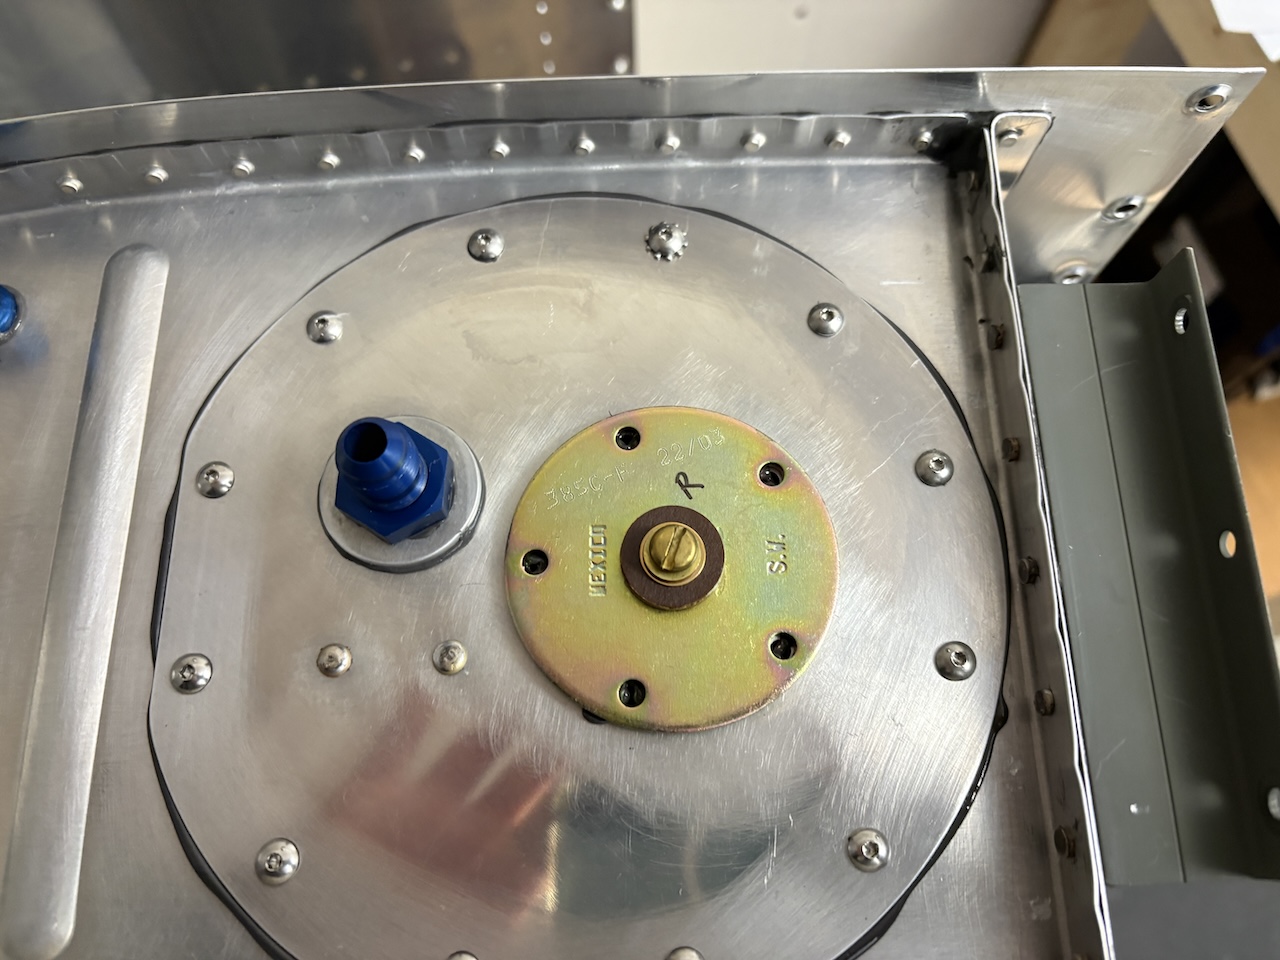
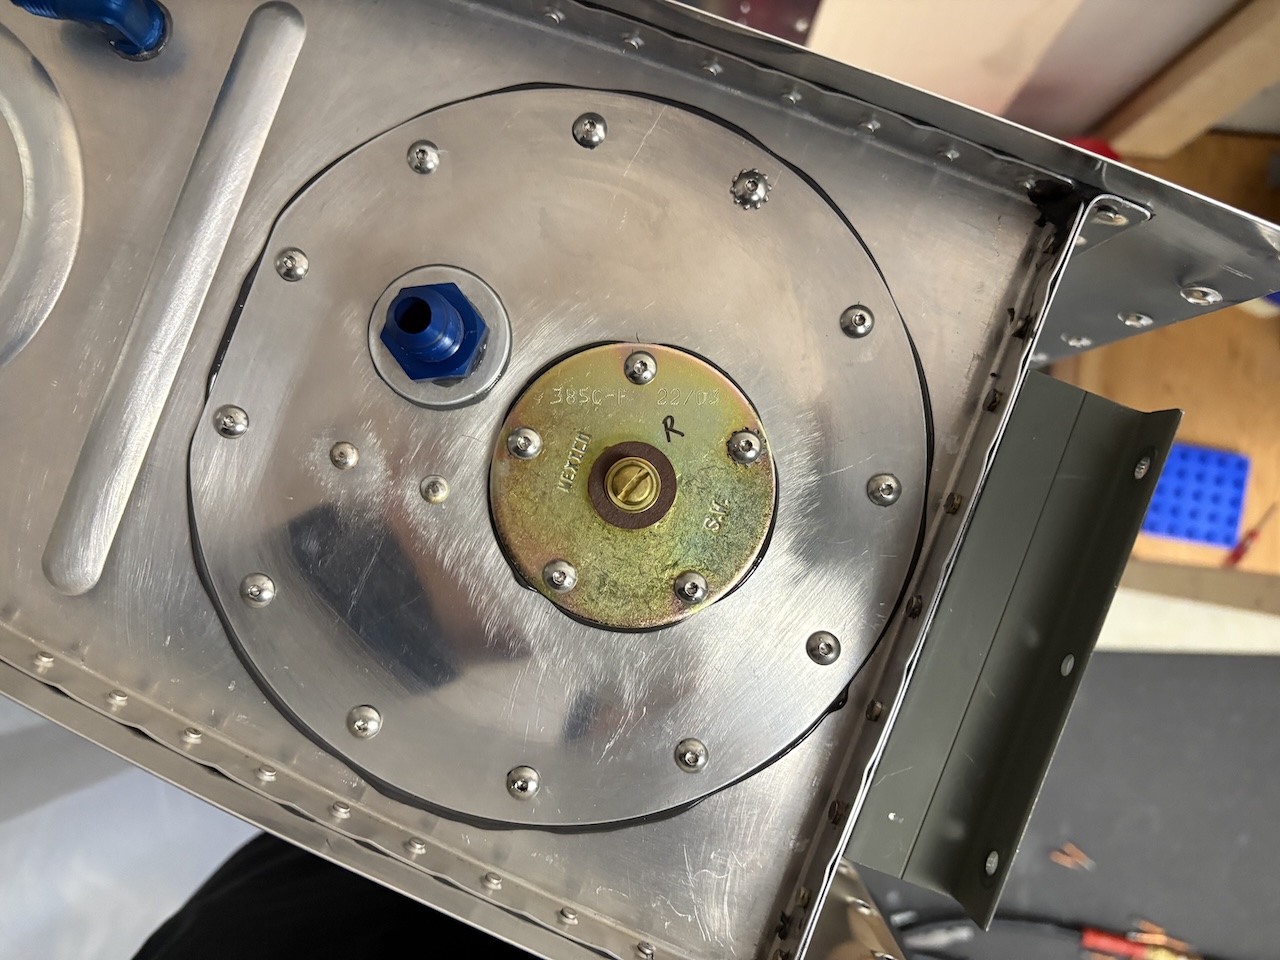
And after the screws have been added and evenly tightened to ooze out a nice bead of sealant.
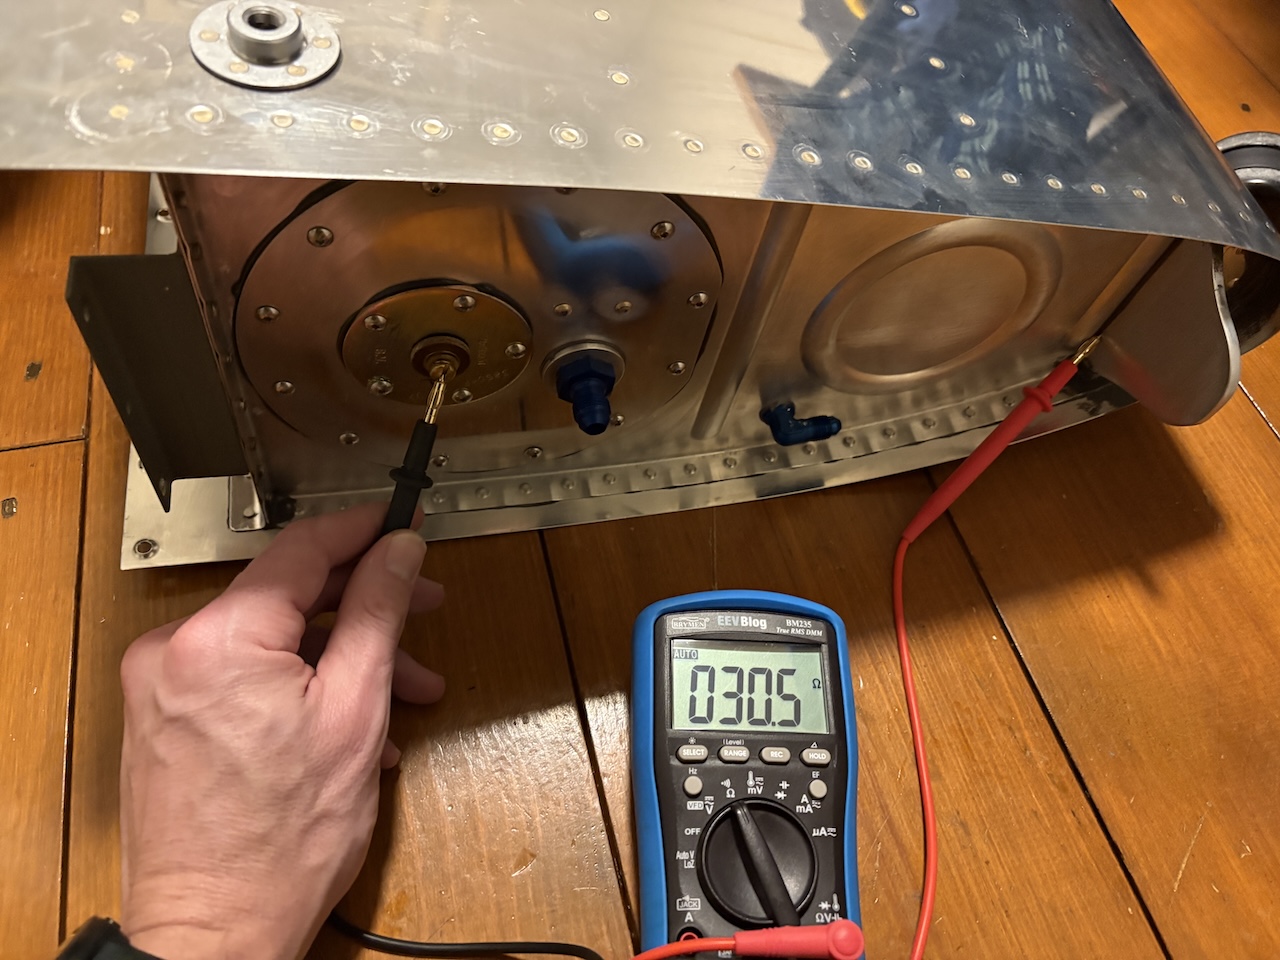
I tested the sender resistance at its limits to make sure it was hitting the numbers it should have been. Here it is in the fully empty position reading over 241.6 Ohms.
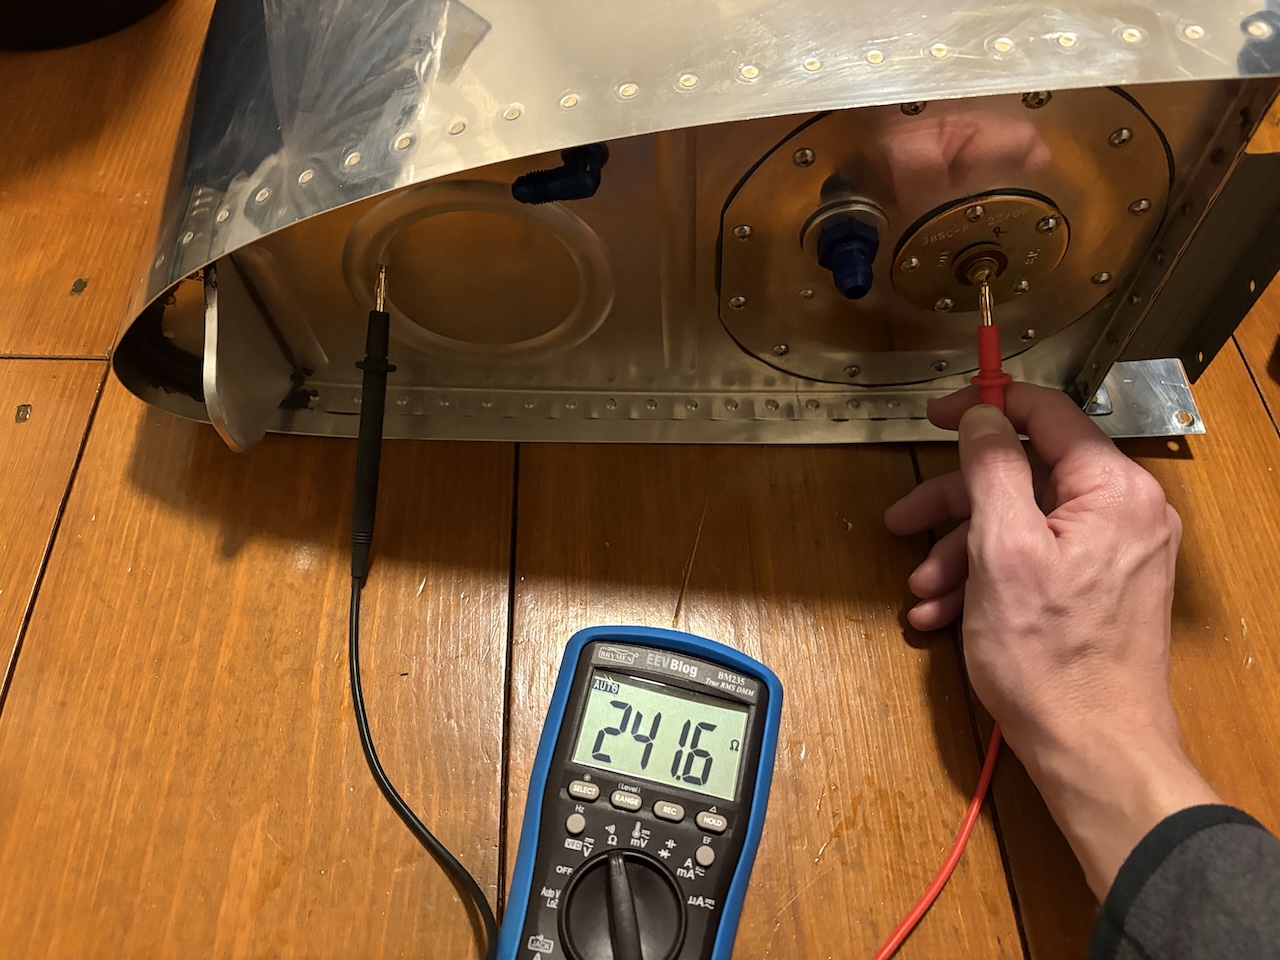
The full position reading 30.5 Ohms. I think the specs are somewhere around 32-240 Ohms so that's right where it should be. I also checked the ground continuity throughout the tank and it was rock solid. No matter where I took the readings with the ground probe on the tank, the resistance readings were identical. You can see I added a stainless steel star washer to a screw on the sender and one screw on the access panel to ensure good ground connection even if some sealant oozed out under the screw heads.
I just need to wait a couple of days and then I can do the test of truth (checking it for leaks)!